One thing we can all use is a little more juice... especially when idling in rush hour traffic on a dark, rainy, and cold winter evening with the headlights, wipers, rear window defroster, and heater fan on full-blast. Even at 3000 rpm, the 2002's original 45 Amp Bosch alternator is only just able to keep up and really has nothing left to charge the battery. Add some high-wattage lights, a powerful stereo, CD ignition, electric engine fan, and/or EFI and the 45A simply won't cut it any more. A popular solution is to install a 55 or 65 Amp unit from a '77-83 E21 320i since it is a straight bolt-in with one slight wiring mod. However, the later 80A alternator from a 1984-85 E30 318i is an even better choice and only a bit more work. Tii owners must note that this information applies only to carbureted '02s; you injected guys will have to work a bit harder.
(Click on a pic
for a much closer look.)
These days, the 80A 318i alternator may be cheaper and more plentiful in wrecking yards than the lesser 320i or 2002 units. Be proactive and have the "new" alternator checked out by an automotive electrical shop before you install it. At least, undo the two screws securing the regulator/brush assembly and check the remaining brush length. Despite what the parts guys will tell you, you can buy just the carbon brushes from BMW and install them yourself if necessary - you don't need to replace the whole regulator.
Parts required for the conversion are:
318i alternator
318i alternator mount bracket and bolt
318i adjusting bracket, geared nut, and bolt
8mm i.d. crimp-on ring terminal for 8-10AWG wire
4mm i.d. crimp-on ring terminal for 14-18AWG wire
Insulating rubber terminal boots
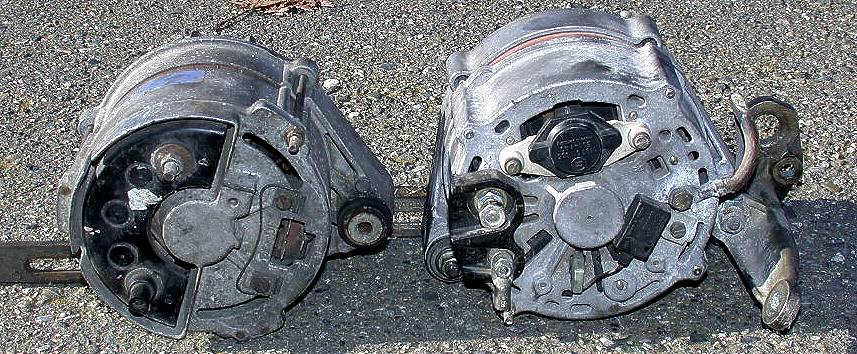
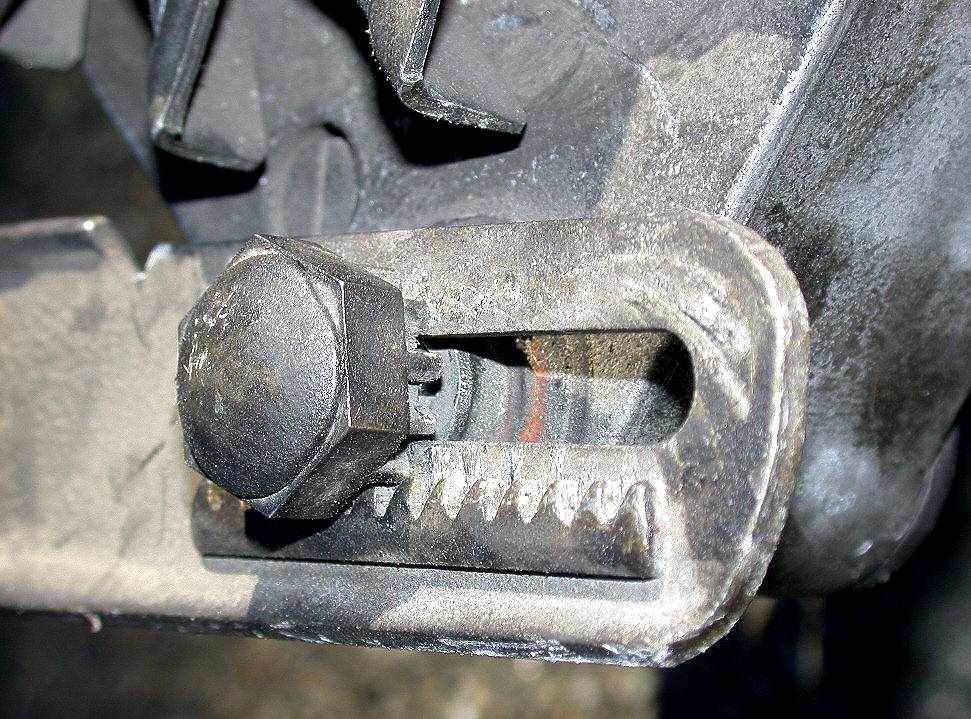
The 318i alternator will only fit in the 2002 if you use the 318i mounting brackets as well, since the pivot and corresponding space on the bracket is wider by about 1/8", and the body is slightly larger overall so the adjusting bracket lines up differently. Can you guess which is the 318i unit?
The pic below shows the difference between the 2002 and 318i brackets.

These small but crucial differences mean you will need to get the 318i alternator complete with both brackets as pictured below - note the big fat ground wire!
With the new brackets come a bonus, the geared adjuster nut! Now, setting the belt tension is as easy as turning your 19mm wrench - no more need for pry bars, hockey sticks, or a third hand.
I have not researched it since 80A seems more than adequate for my needs, but I have a hunch the new larger mount bracket might accommodate some even higher output Bosch alternators from other models as well. If you know for sure, let me know and I will add the info here.
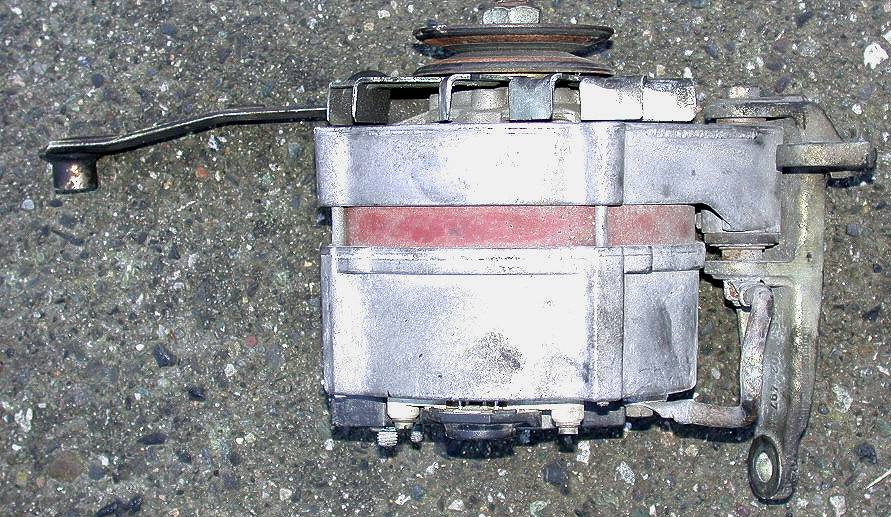
Here's my original alternator in its home of 30 years:
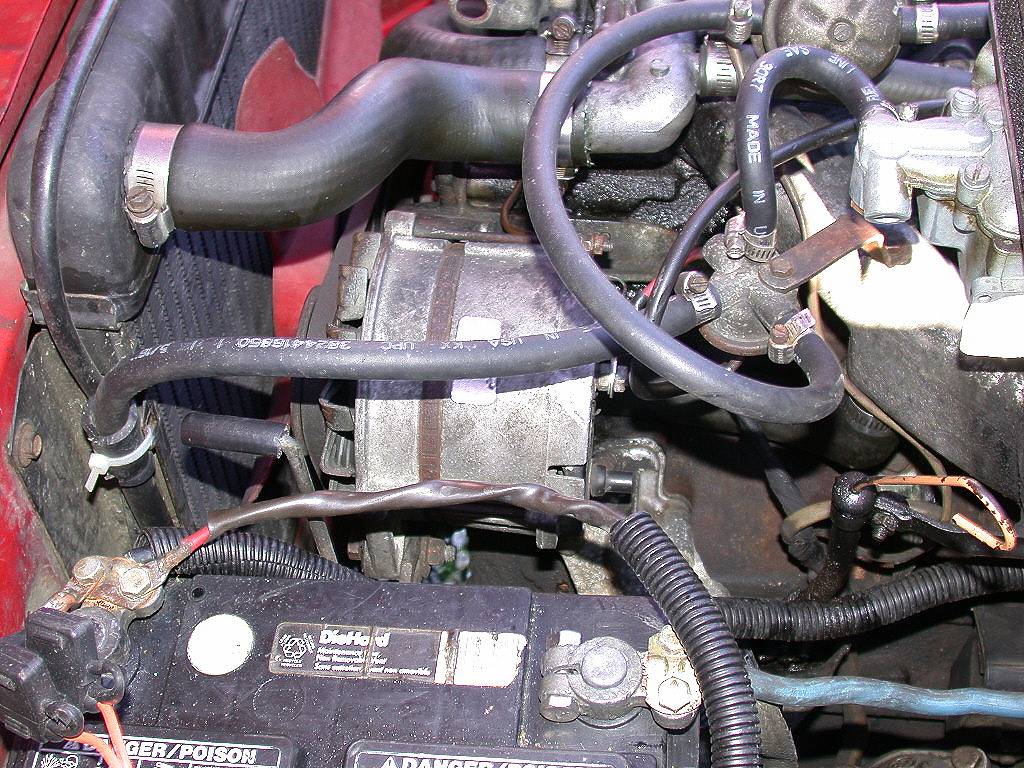
It, along with the mounting bracket will have to come out. Remove the battery, starting with the negative terminal - just trust me. The swap would be straightforward, however, the lower front bolt on the mount bracket won't come all the way out unless you remove the water pump pulley. Of course, that means you must first remove the fan and to do that while keeping your knuckles, you will need to pull the radiator. DOH!
There's no way around it, so you might as well remove the rad first and make it easier on yourself.
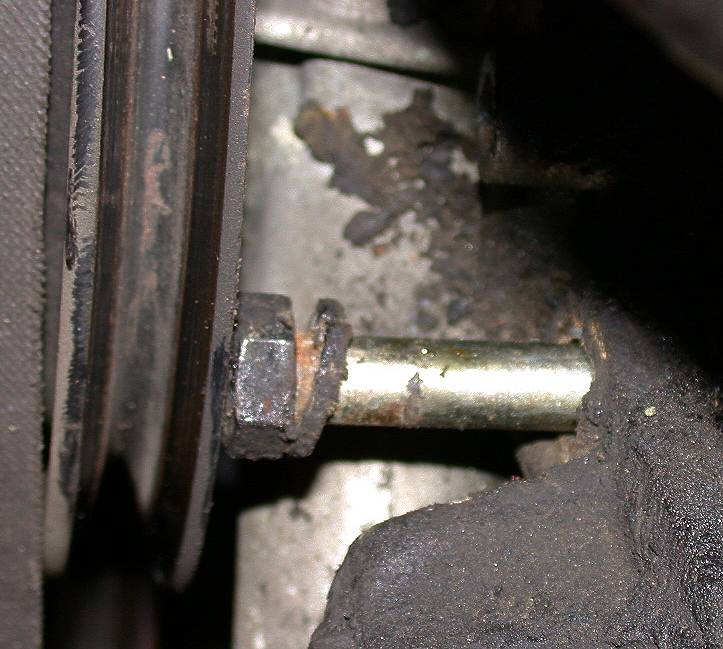
With the old alternator and brackets out, installation of the 318i unit complete with brackets is the reverse. Note that the stud on which the adjusting bracket pivots is a wee bit short for use with the new bracket. You can either try to remove the stud (risky) and use the long bolt from the 318i, or just do what I did and install the nut without a washer, using loctite instead - make it snug but only fully tighten it after you have set the belt tension. The nut only keeps the bracket from walking forward off the stud so as long as it doesn't disappear completely, nothing bad will happen and being short by 1/2 a thread is not a problem.
The original 2002 alternator uses an external voltage regulator. It is a rectangular metal box with a three-prong connector underneath (looks very similar to the one on the alternator), mounted on the driver's side of the engine compartment, near the battery. The later style alternators use an internal voltage regulator. Fortunately, you only need to modify one connection to make the new alternator work.
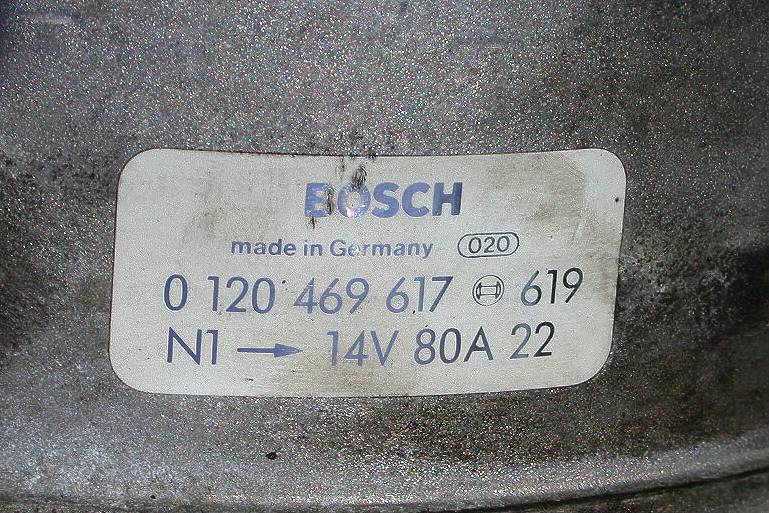
Wiring it up only requires that you install a new, larger ring terminal onto the fat red B+ wire, and that you cut the blue D+ wire from the three prong alternator connector and install a 4mm ring connector onto it. Bosch and BMW make it easy to figure out how to hook it all up - they labeled the connections! Its good they did, too since the proverbial "blue" D+ wire everyone talks about had faded to a nice seafoam green on my car:

The 318i alternator is similarly labeled:

Connect the fat red wire to the fat terminal post marked B+ and connect the small "blue" wire to the terminal post marked D+. It is a fine idea to use rubber boots over the connections, especially the B+ since it is a direct, unfused connection to the battery sitting right under your carburetor and is easily shorted by flailing wrenches, etc.
The external regulator should be unplugged and may now be removed from the car and given to a less fortunate '02 owner, or declared to be a rare artifact of the passed electro-mechanical age and sold on eBay for thousands. The three-prong plugs for the alternator and the old regulator can be left to dangle or cut off since the brown and black wires that join the now-unused plugs are not connected to anything else. The three blue wires at the regulator end must remain connected together and insulated, of course, and the bundle of brown wires attached to the old regulator's mounting screw still needs to be electrically connected to the body - those are the grounds for the horn and headlights, IIRC.
If you plan on really taxing your newfound power generating capacity, or you just want to be technically correct, the fat red B+ wire should be upgraded to something like 4 AWG wire. You can decide if you need to upgrade by starting the car, setting the idle to 2000 RPM, and turning on all the electrical stuff you would ever run at once and then measure the voltage drop between the B+ terminal at the alternator and the battery positive post. Anything over a few tenths of a volt should at least inspire you to clean and tighten the connections. The ground connection's integrity can be checked the same way by touching one probe of a DMM to the body of the alternator and the other to the engine.
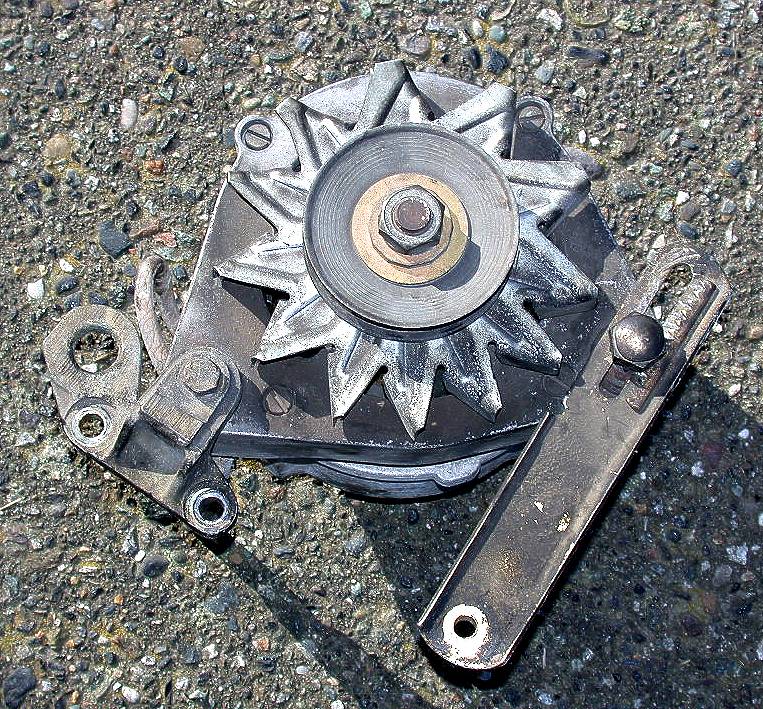
Here is an "after" pic of the 318i alternator, much happier in its new home than it ever was in that pokey 318i:
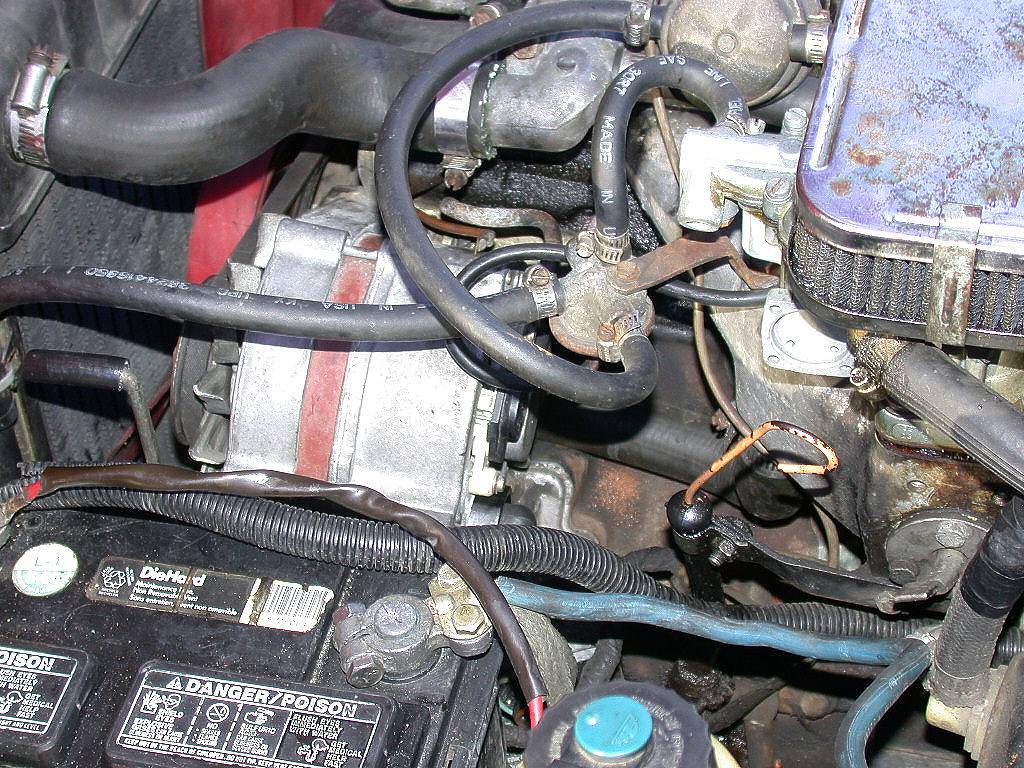
Other than being a little bigger, it looks very close to stock and there are no clearance issues. The pulleys line up perfectly and this setup even uses the same size v-belt.
You might notice that when you first start the car, the red "L" indicator lamp does not go out until the engine is revved past about 1200 rpm. This is normal and happens because the alternator has not yet spun fast enough to become "self-exciting" (yeah, save your lewd comments, buddy). In fact, you may never notice this since a cold start will almost always have the car on a fast idle and a warm start usually requires part throttle. It's one of the reasons EFI cars will always rev slightly at startup, then settle to normal idle speed. Once the light goes out, it will stay out and your system voltage at idle will be around 13.5 to 14 Volts, even with the lights and heater fan on! This is much better than the stock system, which dipped down to 12.5 and less under a full load.
Now you can add your EFI and DIS...


